
START HERE / STAR CLUSTER BALL
How to Play Star Cluster Ball: Your First Game
A practical beginner guide to the table, a controlled first push, changing ball positions, match etiquette, and the questions to ask before play.
QUICK RULES
Your first game in five steps
Practise the movement first; confirm your event’s turns and scoring before keeping score.
- 1 Find the setup
- Identify the release area, the two ball colours and three target plates. Prepare
- 2 Push one ball
- Choose a clear route, release from the permitted area, and wait until every ball stops. Release
- 3 Read the result
- Check the final position; change either direction or pace on your next try. Practise
- 4 Confirm rules
- Ask who starts, who plays after a score, how points and bonuses work, and when play ends. Before play
- 5 Play together
- Use the same agreed rules to judge valid positions and keep score. Match

01 / START HERE
Confirm the format before your first shot
The best preparation for a first Star Cluster Ball session is not memorizing every scoring claim found online. Understand the table and the format actually being used in front of you. Ask a host to point out the release area, the three target plates, the playing boundary and what happens when a ball leaves the surface. Confirm the two ball colours, who starts, whether a successful shot gives another turn, and how a game ends. A teaching session, social game and tournament may make different choices. A short local rules card prevents confusion.
If the session uses a timer or electronic scorer, ask for a demonstration before play. Numbers printed near targets do not necessarily tell the whole scoring story; published explanations also discuss chains and full plates, and the exact treatment depends on the event. In a formal match, establish who decides fouls and disputed positions. You do not need to learn every exception at once. Knowing whom to ask when a close call occurs is enough to begin with confidence.
02 / START HERE
Read the table as four connected areas
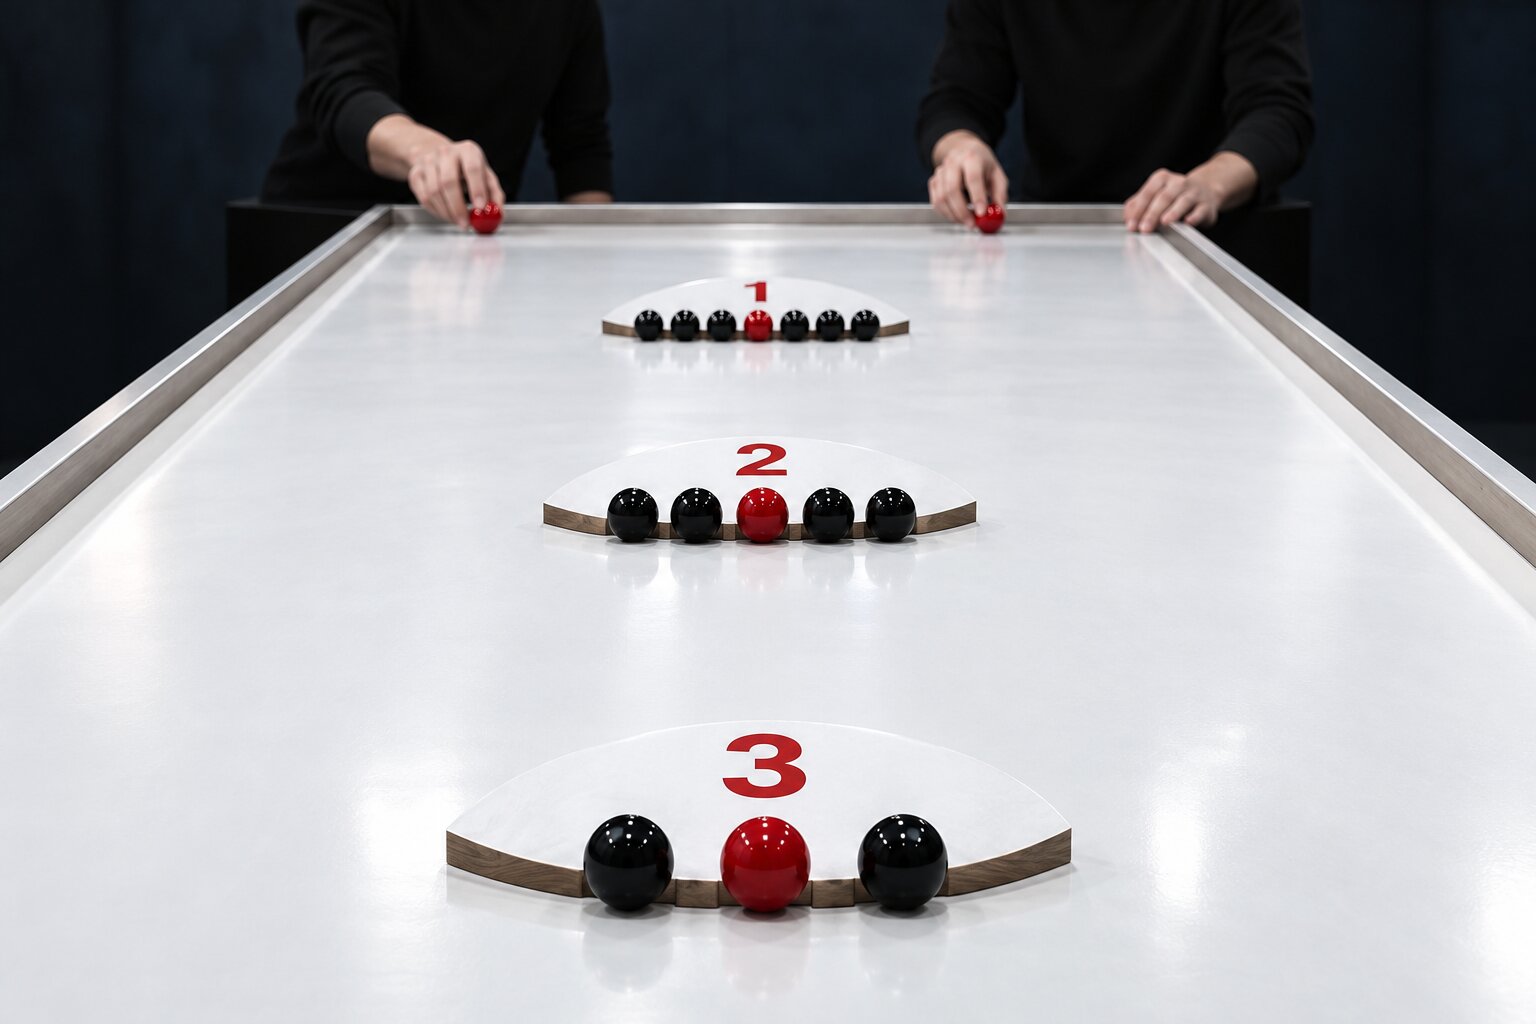
Divide your view into the release point, the ball’s route, the target plates and the outer boundary. The release point tells you where a legal push starts. The route tells you how far the ball must travel and which settled balls may interfere. The target plates offer positions to pursue. The boundary shows why excessive pace or a wide angle can change the outcome. Common public imagery shows three semicircular plates; one overview describes a seven-, five- and three-position arrangement. First learn to identify the parts, then ask how your event values them.
Notice the slope and rails as well. A pace that seems appropriate on a level surface may travel differently on the actual table. Contact with a rail can also change a route. Use a practice ball if the organizer permits it, and watch how it travels and slows. Recalibrate when you change tables or balls rather than assuming yesterday’s touch transfers automatically. Surface condition, ball material and table dimensions may all affect the result; any precise equipment specification belongs with the maker or host.
03 / START HERE
Make your first push repeatable
Choose a safe and easily visible target area instead of immediately attempting the most crowded or distant position. Keep your body steady, release the ball from a permitted place and observe whether it follows the intended line. Where does it begin to slow? Where does it finally settle? Your first attempt is a baseline, not a verdict on your talent. On the next attempt, keep your stance and release point similar so that the difference between results tells you something useful. Follow any local instruction about legal movement and safety.
Think in three steps: intended target, actual movement and final result. State the area you want before taking the shot. After the ball settles, compare the route with your intention. If the distance is right but the ball goes left, adjust direction first. If the direction is right but it stops early, change pace a little. Avoid changing both dramatically at once. A repeatable release is a stronger foundation than a single spectacular ball that you cannot reproduce.
04 / START HERE
Three short practice sets
Use the first set to learn direction. Pick one visible reference point and send several balls with similar pace. Are they consistently drifting to one side? Make a small directional correction and compare. Use the second set for distance: once the line is reasonably stable, try settling balls near, midway and farther along the table. Only in the third set should you concentrate on a target plate and try to reach the same area repeatedly. This order keeps direction, pace, position and score from becoming one confusing task.
Keep a simple record for five attempts per set: left, right, short, long or near the intended area. You do not need pretend precision. Look for the most frequent error and work on that one next time. If a ball hits an obstacle, mark the attempt as influenced by the layout rather than blaming every part of the outcome on your release. A player who can explain why a shot missed often improves more steadily than one who only celebrates an occasional score.
05 / START HERE
Look at the whole position when play begins
The main difference between solo practice and a match is that the table does not stay empty. An opponent can occupy a target position, narrow a lane or change an arrangement after contact. Before your turn, take a few seconds to identify open spaces, relatively clear routes and the locations of both colours. Then decide whether to pursue a direct result or leave a better position for later. You do not need advanced terminology. Simply looking across the full table before every release is already a meaningful change from rolling a ball without a plan.
If the best choice is unclear, use a route you can control. Stable placements teach you how the table responds. Repeated attempts at a very difficult target may make it impossible to tell whether a miss came from technique, judgment or misunderstanding the rules. Watch the opponent’s release too. Their pace and angle on the same surface may reveal useful information, although you should test any lesson with your own movement rather than copying a gesture blindly.
06 / START HERE
Handle points, mistakes and close calls
A ball reaching a target plate does not license a player to announce points from an unrelated online chart. Public descriptions mention base scores, chains, grand slams and unusual ball states, but a host may use a simplified or revised format. Use the local rules card, umpire or scoring system consistently. A ball displaced by contact, one near a boundary or a release made beyond the permitted line can be especially contentious. Resolve these cases before play where possible and pause to clarify when they occur.
A miss can still be useful feedback. A ball that stops short points toward a pace adjustment. A ball that catches an obstacle may show that you noticed the target but underestimated the existing layout. A boundary mistake calls for another look at the release and the line. Convert the outcome into a question for the next practice set rather than treating it as a personal failure. If equipment behaves unexpectedly or anyone’s safety is in doubt, stop and involve the organizer.
07 / START HERE
Make a first match worth learning from
Set a first match’s goal as completing the process well, not merely winning. Confirm colours and first turn, use one agreed format, and let someone record points or positions clearly. Wait until each ball has settled before deciding its status. Afterward, each player can recall one shot: what was the intention, what happened, and what would change next time—the line, pace or target? This short review turns a social game into a useful learning session without taking away the fun.
If permitted, photograph the starting and ending layout or note a few key positions. Obtain consent before filming other players and do not stand in a release lane or block an umpire to capture footage. When discussing a tactical choice, describe what was actually on the table first, then offer your interpretation. “I think a route was open on the left” is different from “the rules required a left-side shot.” That distinction respects both fellow players and the event format.
08 / START HERE
Common beginner errors and better alternatives
The first common error is aiming only for the plate that appears most valuable, even when pace control is still inconsistent. Begin with a target you can reach repeatedly. The second is changing the entire technique after every miss, which leaves no comparable attempts. The third is celebrating when a ball merely touches a target, before it has stopped or before another ball changes its position. The fourth is importing a score heard in a short video into a different event. Observe, confirm, adjust a little and wait for the result.
Another error is assuming that a harder push is always the right way to reach a distant target. Pace matters, but a ball moving too quickly can pass a good position, collide unpredictably or leave a poor next arrangement. Establish a controlled near placement before adding distance. If the surface changes, rebuild that sense of pace. Competitive play involves deciding when to be reliable and when to accept more risk, based on the actual position rather than a fixed rule of thumb.
09 / START HERE
A practical first-session checklist
Before the session: identify the table and ball set, release line, plates and boundaries. Confirm first player, scoring, end condition and who resolves disputed calls. During practice: choose one visible target, repeat a similar release and correct direction before pace. During a match: let each ball settle, then scan open positions, obstacles and the opposing colour before your turn. After play: remember one successful placement and one recurring error. Take one clear question into the next practice session.
This checklist is not a demand to master every rule on day one. It turns a first experience into an orderly learning process. On the next visit, you can try another target plate, add a positional choice or bring a question from a match recording to the host. Star Cluster Ball can begin with one push. Its lasting appeal is the habit of looking again after that push: the position has changed, so the next decision deserves fresh thought.
10 / START HERE
What to bring and how long learning takes
At a hosted experience, you may not need to buy equipment first. Ask the organizer whether balls are supplied, booking is required, fees apply and filming is allowed. Clothing, minimum age and venue arrangements are also local matters. You do not need a large vocabulary before trying the game. If you plan to buy a table, experience a real one first and confirm size, ball material, target plates and support with the supplier rather than judging only from a promotional image.
There is no universal answer to how long the sport takes to learn. A clear explanation may be enough to understand the release area, targets and turn order. Sending a ball repeatedly to a chosen position takes purposeful practice. Do not mistake a quick demonstration for mastery, or one difficult first day for a lack of aptitude. Give each practice set a visible aim such as fewer overshoots. Partners with different experience can describe what they see, but test their advice against actual results on the table in front of you.